In this article I will explain a step by step tutorial, how to connect and configure
Entity Framework to
MySQL database in ASP.Net MVC.
Database
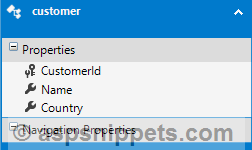
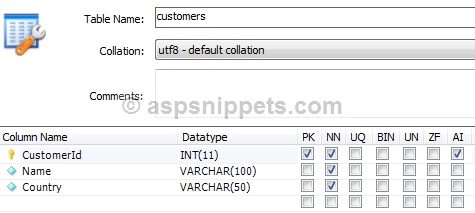
I have made use of the following table Customers with the schema as follows.
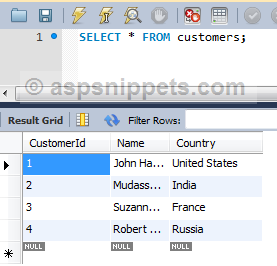
I have already inserted few records in the table.
Note: You can download the database table SQL by clicking the download link below.
Configuring and connecting Entity Framework to MySQL database
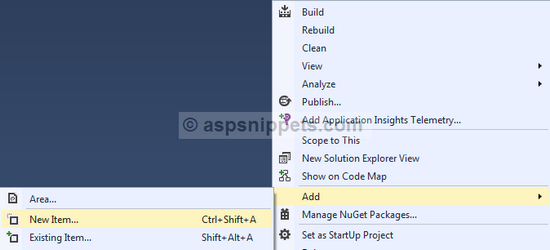
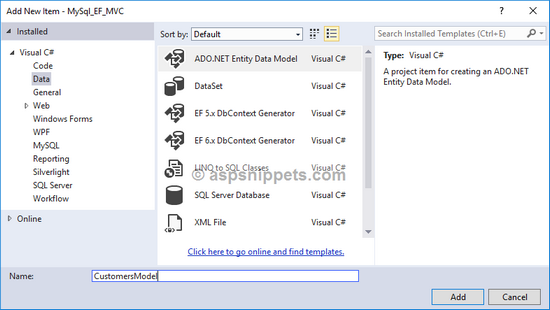
1. You will need to add Entity Data Model to your project by right clicking the Solution Explorer and then click on Add and then New Item option of the Context Menu.
2. From the Add New Item dialog window, select ADO.NET Entity Data Model and give a suitable Name and click on Add.
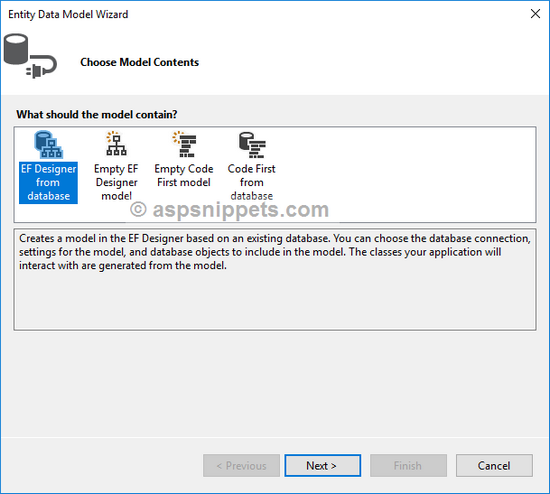
3. Then, from the Entity Data Model Wizard select EF Designer from database option.
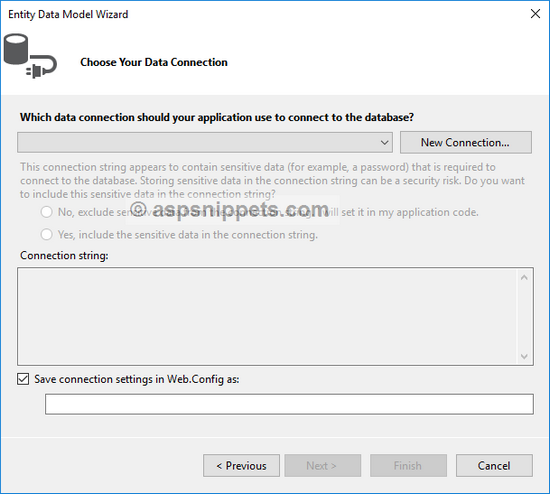
4. Now the wizard will ask you to connect and configure the Connection String to the database. Here click on New Connection.
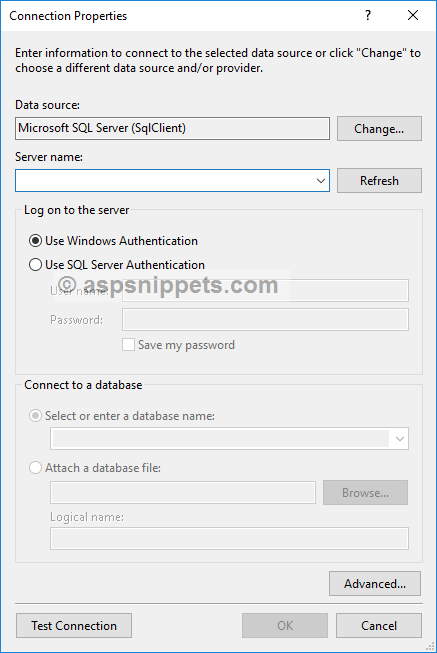
5. In the next dialog, you will need to click on the Change button in order to select MySQL Data Provider.
6. From the following window, you will need to select the MySQL Database as Data Source and click on OK.

7. Then, you will be asked to provide the Connection details for the
MySQL database.
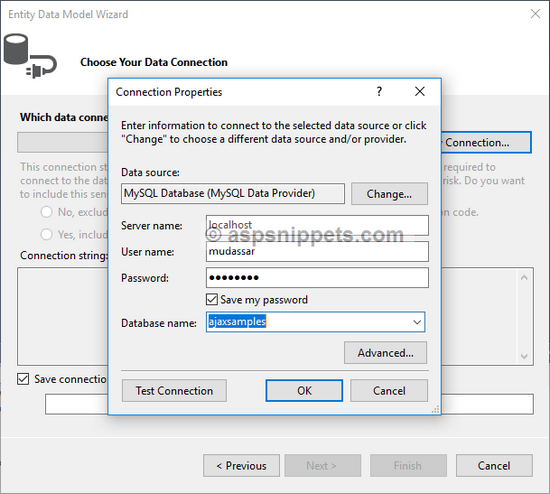
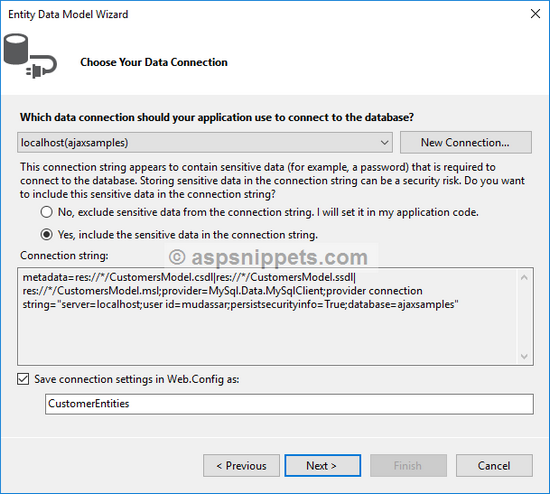
8. Once the Connection String is generated, select the Yes, include the sensitive data in the connection string RadioButton and click on Next.
10. Now you will need to choose the
Tables that you need to connect and work with
Entity Framework. Here
Customers Table is selected.
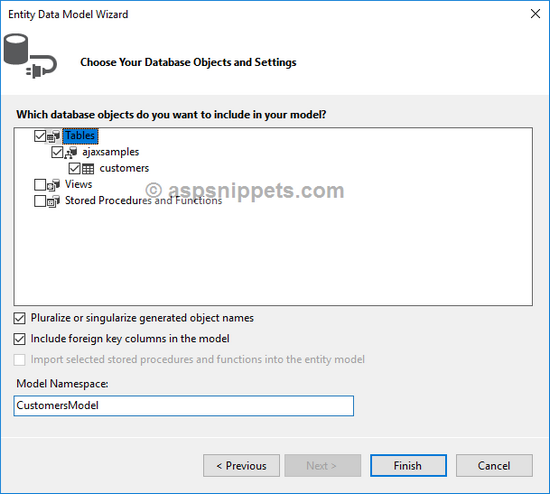
11. The above was the last step and now, the Entity Data Model is ready with the Customers Table of the AjaxSamples database.