In this article I will explain with an example, how to perform select, insert, edit, update, delete using Entity Framework in ASP.Net GridView using C# and VB.Net.
This process is also known as CRUD i.e. Create, Read, Update and Delete in GridView using Entity Framework in ASP.Net.
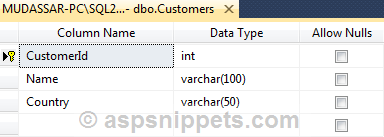
Database
I have made use of the following table Customers with the schema as follows.
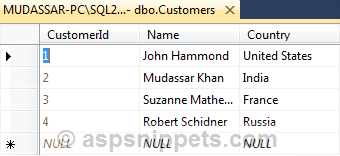
I have already inserted few records in the table.
Note: You can download the database table SQL by clicking the download link below.
Configuring and connecting Entity Framework to database
Now I will explain the steps to configure and add Entity Framework and also how to connect it with the database.
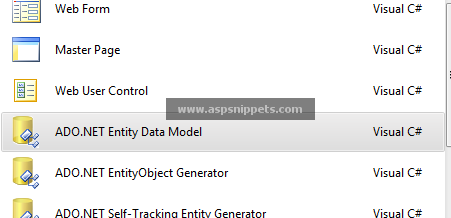
You will need to add Entity Data Model to your project using Add New Item Dialog as shown below.
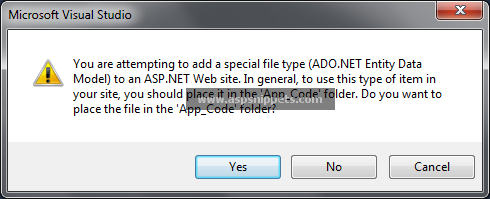
As soon as you add the Entity Data Model to your project you will be prompted with the following dialog. You need to click YES button.
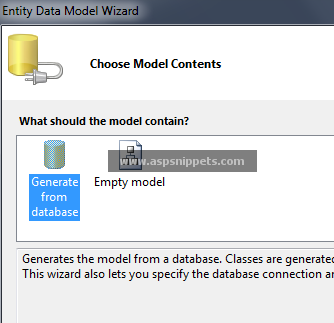
Then the Entity Data Model Wizard will open up where you need to select Generate from database option
Now the wizard will ask you to connect and configure the connection string to the database.
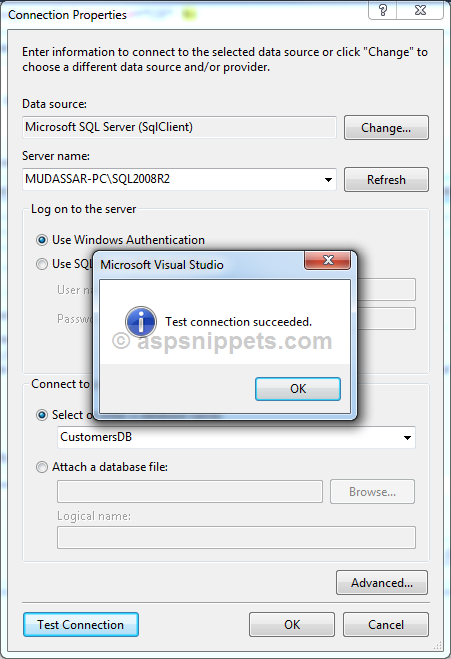
You need to select the
1. SQL Server Instance
2. Database
And the click Test Connection to make sure all settings are correct. Finally press OK to move to the next step.
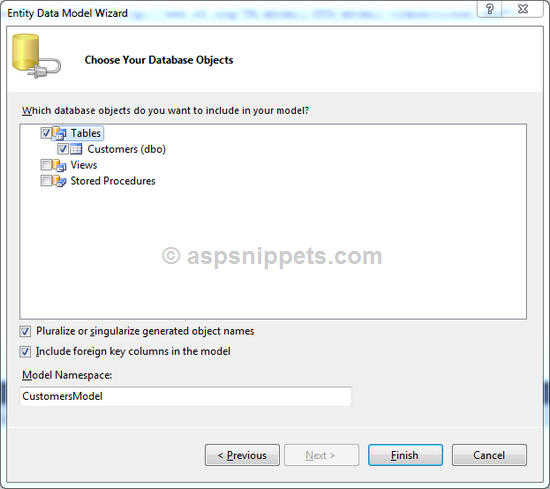
Next you will need to choose the Tables you need to connect and work with Entity Framework. Since I need to work on the Customers Table I have checked that.
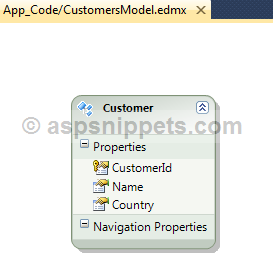
The above was the last step and you should now have the Entity Data Model ready with the Customers Table.
HTML Markup
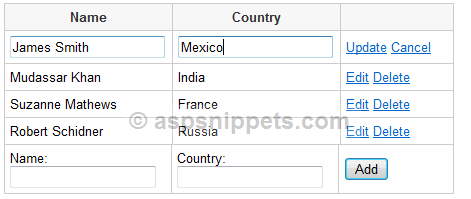
The HTML Markup consists of an ASP.Net GridView with multiple event handlers assigned which will be discussed later.
The GridView has a CommandField column which will display the command buttons i.e. Edit, Update, Cancel and Delete.
Below the GridView there’s a Form which will allow us to insert data to the SQL Server database table using Entity Framework.
<asp:GridView ID="GridView1" runat="server" AutoGenerateColumns="false" DataKeyNames="CustomerId"
OnRowDataBound="OnRowDataBound" OnRowEditing="OnRowEditing" OnRowCancelingEdit="OnRowCancelingEdit"
OnRowUpdating="OnRowUpdating" OnRowDeleting="OnRowDeleting" EmptyDataText="No records has been added.">
<Columns>
<asp:TemplateField HeaderText="Name" ItemStyle-Width="150">
<ItemTemplate>
<asp:Label ID="lblName" runat="server" Text='<%# Eval("Name") %>'></asp:Label>
</ItemTemplate>
<EditItemTemplate>
<asp:TextBox ID="txtName" runat="server" Text='<%# Eval("Name") %>'></asp:TextBox>
</EditItemTemplate>
</asp:TemplateField>
<asp:TemplateField HeaderText="Country" ItemStyle-Width="150">
<ItemTemplate>
<asp:Label ID="lblCountry" runat="server" Text='<%# Eval("Country") %>'></asp:Label>
</ItemTemplate>
<EditItemTemplate>
<asp:TextBox ID="txtCountry" runat="server" Text='<%# Eval("Country") %>'></asp:TextBox>
</EditItemTemplate>
</asp:TemplateField>
<asp:CommandField ButtonType="Link" ShowEditButton="true" ShowDeleteButton="true" ItemStyle-Width="150"/>
</Columns>
</asp:GridView>
<table border="1" cellpadding="0" cellspacing="0" style="border-collapse: collapse">
<tr>
<td style="width: 150px">
Name:<br />
<asp:TextBox ID="txtName" runat="server" Width="140" />
</td>
<td style="width: 150px">
Country:<br />
<asp:TextBox ID="txtCountry" runat="server" Width="140" />
</td>
<td style="width: 100px">
<asp:Button ID="btnAdd" runat="server" Text="Add" OnClick="Insert" />
</td>
</tr>
</table>
Namespaces
You will need to import the following namespace.
C#
VB.Net
Binding the GridView using Entity Framework
The GridView is populated from the database using Entity Framework inside the Page Load event of the page.
C#
protected void Page_Load(object sender, EventArgs e)
{
if (!this.IsPostBack)
{
this.BindGrid();
}
}
private void BindGrid()
{
using (CustomersEntities entities = new CustomersEntities())
{
GridView1.DataSource = from customer in entities.Customers
select customer;
GridView1.DataBind();
}
}
VB.Net
Protected Sub Page_Load(sender As Object, e As EventArgs) Handles Me.Load
If Not Me.IsPostBack Then
Me.BindGrid()
End If
End Sub
Private Sub BindGrid()
Using entities As New CustomersEntities()
GridView1.DataSource = From customer In entities.Customers _
Select customer
GridView1.DataBind()
End Using
End Sub
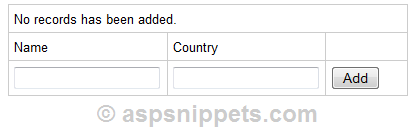
Following is the GridView containing records.

For the GridView I have set EmptyDataText to display message when no records are present.
Inserting records to GridView using Entity Framework
The following event handler is executed when the Add Button is clicked. The name and the country values are fetched from their respective TextBoxes and then passed through an object of Customer class to the AddToCustomers method of Entity Framework.
Finally the SaveChanges method of Entity Framework is called which updates the changes to the database and the GridView is again populated with data by making call to the BindGrid method.
C#
protected void Insert(object sender, EventArgs e)
{
using (CustomersEntities entities = new CustomersEntities())
{
Customer customer = new Customer
{
Name = txtName.Text,
Country = txtCountry.Text
};
entities.AddToCustomers(customer);
entities.SaveChanges();
}
this.BindGrid();
}
VB.Net
Protected Sub Insert(sender As Object, e As EventArgs)
Using entities As New CustomersEntities()
Dim customer As New Customer() With { _
.Name = txtName.Text, _
.Country = txtCountry.Text _
}
entities.AddToCustomers(customer)
entities.SaveChanges()
End Using
Me.BindGrid()
End Sub
Editing and Updating GridView records using Entity Framework
Edit
When the Edit Button is clicked, the GridView’s OnRowEditing event handler is triggered. Here simply the EditIndex of the GridView is updated with the Row Index of the GridView Row to be edited.
C#
protected void OnRowEditing(object sender, GridViewEditEventArgs e)
{
GridView1.EditIndex = e.NewEditIndex;
this.BindGrid();
}
VB.Net
Protected Sub OnRowEditing(sender As Object, e As GridViewEditEventArgs)
GridView1.EditIndex = e.NewEditIndex
Me.BindGrid()
End Sub
Update
When the Update Button is clicked, the GridView’s OnRowUpdating event handler is triggered.
CustomerId which is the primary key is fetched from the DataKey property of GridView while the Name and Country fields are fetched from their respective TextBoxes and are set to the Customer object fetched from the Entity Framework collection using the CustomerId.
Finally the SaveChanges method of Entity Framework is called which updates the changes to the database.
C#
protected void OnRowUpdating(object sender, GridViewUpdateEventArgs e)
{
GridViewRow row = GridView1.Rows[e.RowIndex];
int customerId = Convert.ToInt32(GridView1.DataKeys[e.RowIndex].Values[0]);
string name = (row.FindControl("txtName") as TextBox).Text;
string country = (row.FindControl("txtCountry") as TextBox).Text;
using (CustomersEntities entities = new CustomersEntities())
{
Customer customer = (from c in entities.Customers
where c.CustomerId == customerId
select c).FirstOrDefault();
customer.Name = name;
customer.Country = country;
entities.SaveChanges();
}
GridView1.EditIndex = -1;
this.BindGrid();
}
VB.Net
Protected Sub OnRowUpdating(sender As Object, e As GridViewUpdateEventArgs)
Dim row As GridViewRow = GridView1.Rows(e.RowIndex)
Dim customerId As Integer = Convert.ToInt32(GridView1.DataKeys(e.RowIndex).Values(0))
Dim name As String = TryCast(row.FindControl("txtName"), TextBox).Text
Dim country As String = TryCast(row.FindControl("txtCountry"), TextBox).Text
Using entities As New CustomersEntities()
Dim customer As Customer = (From c In entities.Customers Where c.CustomerId = customerId _
Select c).FirstOrDefault()
customer.Name = name
customer.Country = country
entities.SaveChanges()
End Using
GridView1.EditIndex = -1
Me.BindGrid()
End Sub
Cancel Edit
When the Cancel Button is clicked, the GridView’s OnRowCancelingEdit event handler is triggered. Here the EditIndex is set to -1 and the GridView is populated with data.
C#
protected void OnRowCancelingEdit(object sender, EventArgs e)
{
GridView1.EditIndex = -1;
this.BindGrid();
}
VB.Net
Protected Sub OnRowCancelingEdit(sender As Object, e As EventArgs)
GridView1.EditIndex = -1
Me.BindGrid()
End Sub
Deleting GridView records
When the Delete Button is clicked, the GridView’s OnRowDeleting event handler is triggered.
CustomerId which is the primary key is fetched from the DataKey property of GridView and is used to fetch the Customer object from the Entity Framework collection using the CustomerId.
The fetched Customer object is passed to the DeleteObject method of Entity Framework and the SaveChanges method of Entity Framework is called which updates the changes to the database.
C#
protected void OnRowDeleting(object sender, GridViewDeleteEventArgs e)
{
int customerId = Convert.ToInt32(GridView1.DataKeys[e.RowIndex].Values[0]);
using (CustomersEntities entities = new CustomersEntities())
{
Customer customer = (from c in entities.Customers
where c.CustomerId == customerId
select c).FirstOrDefault();
entities.DeleteObject(customer);
entities.SaveChanges();
}
this.BindGrid();
}
VB.Net
Protected Sub OnRowDeleting(sender As Object, e As GridViewDeleteEventArgs)
Dim customerId As Integer = Convert.ToInt32(GridView1.DataKeys(e.RowIndex).Values(0))
Using entities As New CustomersEntities()
Dim customer As Customer = (From c In entities.Customers Where c.CustomerId = customerId _
Select c).FirstOrDefault()
entities.DeleteObject(customer)
entities.SaveChanges()
End Using
Me.BindGrid()
End Sub
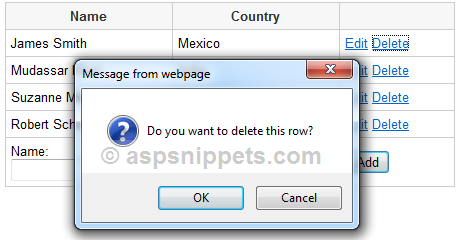
In order to display a confirmation message when deleting row, I have made use of OnRowDataBound event handler where I have first determined the Delete Button and then I have attach the JavaScript Confirm to its client side Click event handler.
C#
protected void OnRowDataBound(object sender, GridViewRowEventArgs e)
{
if (e.Row.RowType == DataControlRowType.DataRow && e.Row.RowIndex != GridView1.EditIndex)
{
(e.Row.Cells[2].Controls[2] as LinkButton).Attributes["onclick"] = "return confirm('Do you want to delete this row?');";
}
}
VB.Net
Protected Sub OnRowDataBound(sender As Object, e As GridViewRowEventArgs)
If e.Row.RowType = DataControlRowType.DataRow AndAlso e.Row.RowIndex <> GridView1.EditIndex Then
TryCast(e.Row.Cells(2).Controls(2), LinkButton).Attributes("onclick") = "return confirm('Do you want to delete this row?');"
End If
End Sub
Downloads