In this article I will explain step by step, how to build a simple SignalR application in ASP.Net Web Forms using C#.
What is SignalR?
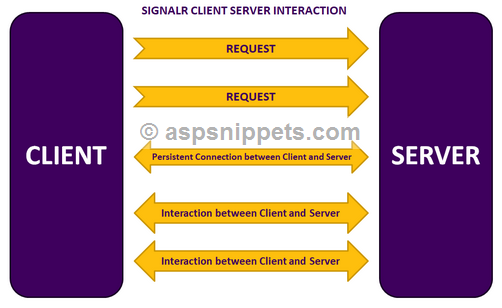
ASP.Net SignalR is a library for ASP.NET developers that makes the process of adding real-time web functionality to applications easy.
Real-time web functionality is the ability to have server code push content to connected clients instantly as it becomes available without having the client to make a new request.
HTTP is a stateless protocol and hence it does not keep information about the clients.
Thus, SignalR makes use of following stateful protocols in order to build communication between Server and multiple clients in order to broadcast messages.
WebSocket
WebSocket is full-duplex protocol, bidirectional and stateful protocol. It keeps the connection between client and server alive until it is terminated either by client or server.
Forever Frames
Forever Frames is part of Comet Model which is a web application model where an HTTP request is held for long period which allows the browser to push data to clients without any request.
Forever Frames model is implemented using a hidden IFRAME HTML element which keeps request open for long periods.
Server Side Events (SSE)
Server Side Events (SSE) is a type of HTTP streaming i.e. HTTP response with MIME type of text/event-stream and it sends plain text messages terminated with double newlines.
With SSE, the API is standardized and the implementation of SSE is very simple.
Long Polling
Polling means to keep on checking with server for new data over a fixed interval of time by making API calls at regular intervals.
There are following two types of Polling:
Short Polling: - Here client requests data from the server and the server will return the response if it is available and if it is not available then it returns an empty response. And this process continues.
Long Polling: - In Long polling, the client send requests to the server and if the response is not available, server will hold the request and return response only when it is available.
Step by step building a simple SignalR Web application
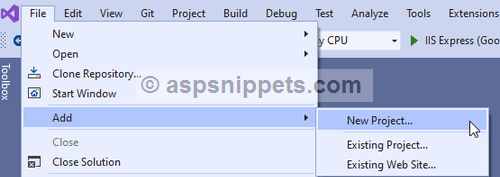
1. Open Visual Studio and select File from the menu and click Add, then New Project.
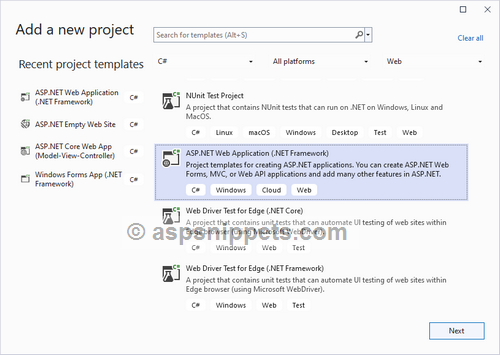
2. Then from the Add a new project dialog window, select ASP.NET Web Application (.NET Framework) and click on Next.
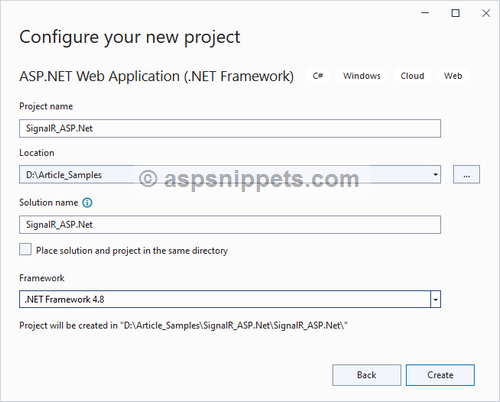
3. Then, give a suitable Project Name, the Location and the Framework and then click on Create.
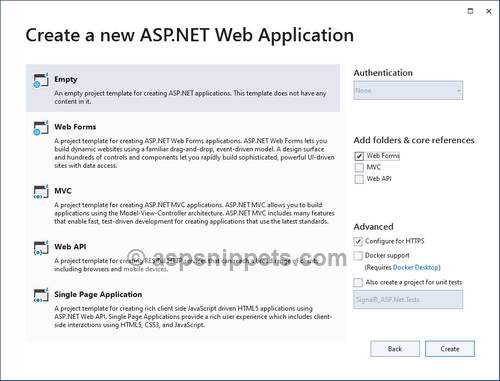
4. Finally, from the Create a new ASP.NET Web Application window, select Empty project template and check the Web Forms CheckBox and click on Create.
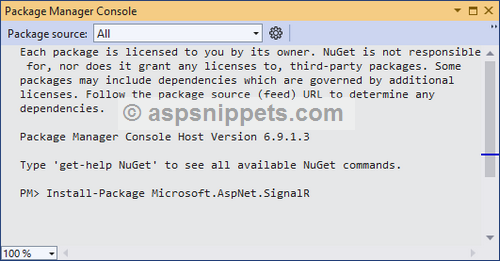
5. Once the project is created, you will need to install the
SignalR package from
Nuget using the following command in the
Package Manager Console window.
Install-Package Microsoft.AspNet.SignalR
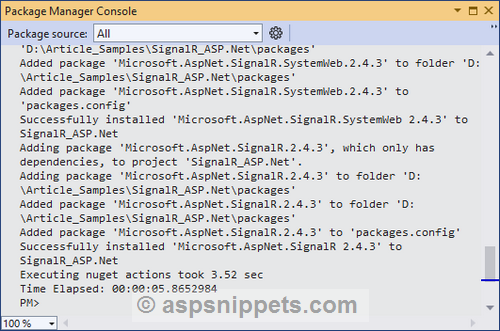
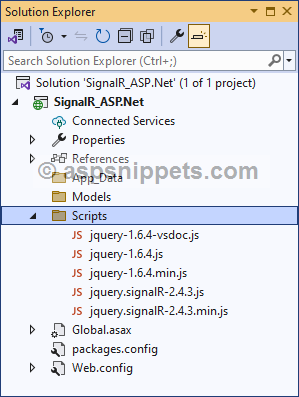
6. Once the SignalR package is successfully installed, the required script files are added in the projects Scripts Folder (Directory) as shown below.
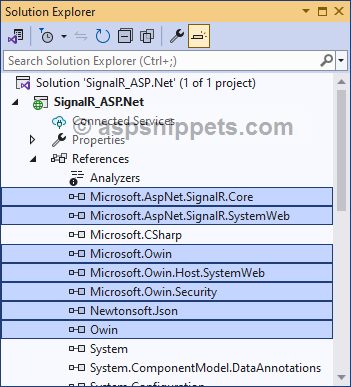
And, the references are added to the References folder as shown below.
Note: SignalR makes use of Microsoft Owin (
Open Web Interface for .NET) which defines an abstraction between .NET web servers and web applications.
7. Now, add a new class to the project (Startup.cs) which will be used for configuring the SignalR in our application (as shown below).
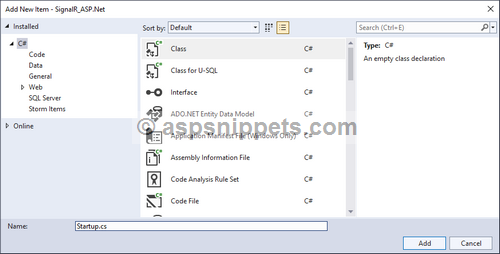
8. Inside the Startup class, the namespaces for Owin are inherited and then the OwinStartup attribute is added to the namespace.
Finally, inside the Configuration method, the SignalR hubs are mapped to the project using MapSignalR method.
using Microsoft.Owin;
using Owin;
[assembly: OwinStartup(typeof(SignalR_ASP.Net.Startup))]
namespace SignalR_ASP.Net
{
public class Startup
{
public void Configuration(IAppBuilder app)
{
// MapsSignalR hubs.
app.MapSignalR();
}
}
}
9. Now, add another class in the project by right clicking the project and then click on Add and then Class option from the Context Menu.
In the Add New Item window, give a suitable name i.e. Chat.cs to the class and click on Add.
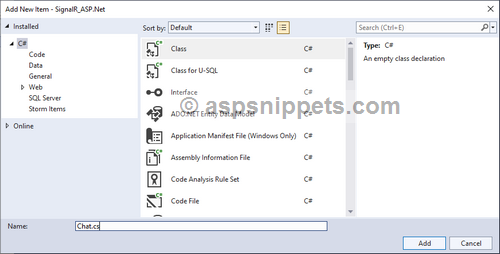
This class will handle the SignalR communication between client and server.
The class inherits Hub class and is set with HubName attribute which is used to create the connection to SignalR Hub.
You will need to create a function with two parameters message and userName i.e. SendMessage.
Inside the SendMessage function, the DisplayMessage function of Clients.All class is called, which pushes the message to all Clients connected to the hub.
using Microsoft.AspNet.SignalR;
using Microsoft.AspNet.SignalR.Hubs;
namespace SignalR_ASP.Net
{
//Defining Hub name.
[HubName("ChatHub")]
public class Chat : Hub
{
// Send Message method.
public void SendMessage(string message, string userName)
{
//Call theDisplayMessage function on all Clients.
Clients.All.DisplayMessage(message, userName);
}
}
}
Finally, the class is look as shown below.

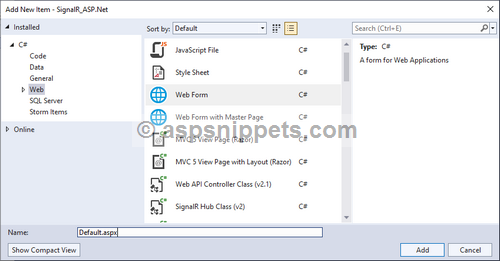
10. Next, add a Web Form to your project and name it Default.aspx.
11. Inside the ASPX page, you will need to add following controls.
TextBox – For input username and message.
Button – For submitting the message.
UL – For displaying the entered message.
<table>
<tr>
<td>User Name:</td>
<td><asp:TextBox ID="txtUserName" runat="server" /></td>
</tr>
<tr>
<td>Message:</td>
<td><asp:TextBox ID="txtMessage" runat="server" /></td>
</tr>
<tr>
<td></td>
<td><asp:Button ID="btnSend" runat="server" Text="Send" Enabled="false" /></td>
</tr>
</table>
<hr />
<ul id="ulMessages"></ul>
12. Then, you will need to inherit following JavaScript files.
1. jquery.min.js
2. jquery.signalR-2.4.3.js
3. hubs
And then, inside the SCRIPT tags, you will need to add
jQuery document ready event handler.
Inside the
jQuery document ready event handler, first the connection to the
Hub is created and then the
DisplayMessage event handler is defined.
And inside the DisplayMessage event handler, the returned message is displayed using HTML Unordered List.
Finally, the Hub is started using the start function.
Then inside the
done event handler of the Hub, the
Send button is enabled and then it is assigned with a
jQuery Click event handler.
When the Send button is clicked, the SendMessage method on the Server is called and the values of the Message and UserName TextBoxes are sent to it.
<script type="text/javascript" src="https://cdnjs.cloudflare.com/ajax/libs/jquery/3.7.1/jquery.min.js"></script>
<script type="text/javascript" src="Scripts/jquery.signalR-2.4.3.js"></script>
<script type="text/javascript" src="signalr/hubs"></script>
<script type="text/javascript">
$(function () {
// Creating the Hub.
var chatHub = $.connection.ChatHub;
//This function will be called by the Server.
//It will be used to push messages to Clients.
chatHub.client.DisplayMessage = function (message, username) {
//Displaying the message.
$("#ulMessages").append("<li><b>" + username + "</b>: " + message + "</li>");
};
// Starting the Hub.
$.connection.hub.start().done(function () {
//Enabling the Button.
$("[id*=btnSend]").removeAttr("disabled");
//Attaching Event handler to the Button.
$("[id*=btnSend]").click(function () {
//Sending the message to the Server.
chatHub.server.sendMessage($("[id*=txtMessage]").val(), $("[id*=txtUserName]").val());
return false;
});
});
});
</script>
Screenshot
Downloads